Don’t Let Weather Changes and Altitude Ruin Your Coffee

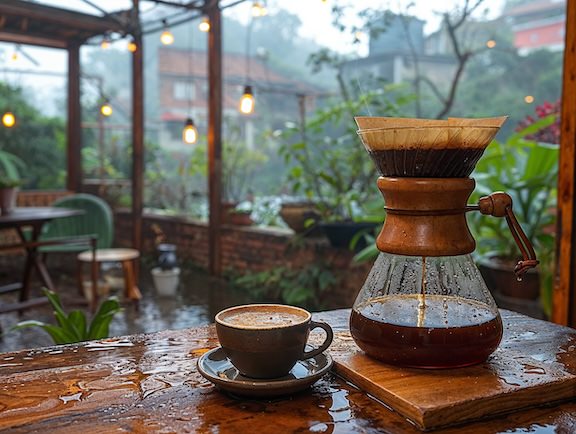
Air pressure changes due to weather as well as altitude, can have an affect on the flavor of your coffee in a few notable ways. I’m going to break down how these factors influence coffee brewing and what adjustments you can make to ensure a consistently great cup of coffee under varying conditions.

How Air Pressure Affects Coffee Flavor

The flavor of coffee can be significantly impacted by air pressure, a factor that influences several key aspects of the brewing process. One of the primary ways air pressure affects coffee is through the boiling point of water. In regions of higher altitudes where the air pressure is lower, water reaches its boiling point at a lower temperature. This reduction in temperature can lead to under-extraction of flavors from the coffee grounds, resulting in a brew that might taste weak or lack depth. On the other hand, at lower altitudes or during weather conditions that increase air pressure, water boils at a higher temperature, which can cause over-extraction. This over-extraction can give the coffee a bitter flavor, as more undesirable compounds are pulled from the grounds.

Furthermore, air pressure plays a role in the extraction rate of coffee compounds. At high altitudes, where air pressure is reduced, the extraction process can be slower, necessitating adjustments to brewing methods to achieve a balanced flavor profile. Additionally, the condition of coffee beans and their grind size can be influenced by both air pressure and humidity. In environments with higher humidity or air pressure, such as lower altitudes, coffee beans may absorb moisture from the air. This moisture can affect the size of the grind needed for optimal extraction, as well as the overall condition of the beans themselves, further impacting the taste of the coffee.

Adjustments for Altitude and Weather Changes

To address the challenges posed by varying air pressure and altitude on coffee flavor, several adjustments can be made to the brewing process. For those at high altitudes facing a lower boiling point of water, using water that has just come off the boil for a shorter duration can aid in increasing the extraction of flavors from the coffee grounds. In contrast, at lower altitudes where the water boils at a higher temperature, allowing the boiled water to cool for a minute or two before brewing can help prevent the bitterness associated with over-extraction.

The grind size of the coffee beans is another aspect that may require alteration. A finer grind at higher altitudes can assist in compensating for the reduced extraction rates due to lower boiling points. Meanwhile, a coarser grind may be preferable in lower altitudes or under high-pressure weather conditions to avoid extracting too much and achieving a bitter taste.

Furthermore, tweaking the brew time according to altitude can enhance the quality of the coffee. Longer brewing times may be beneficial at higher altitudes, whereas shorter brewing times could yield better results at lower altitudes. Exploring different brewing methods, particularly those like the French press or pour-over, which offer more control over brewing variables such as temperature and time, can also lead to improved outcomes.

And finally, considering the impact of humidity is essential, especially in terms of bean storage. In humid conditions or areas, it’s vital to store coffee beans in an airtight container to prevent them from absorbing moisture. This precaution helps maintain the beans’ integrity, preventing flavor loss and ensuring they grind effectively.

Understanding these effects and making appropriate adjustments to your brewing process can help you achieve a consistent and delicious cup of coffee, regardless of changes in altitude or weather conditions. Experimentation is key, as the perfect adjustment can vary based on personal taste preferences, specific coffee beans, and the precise conditions you’re dealing with.

Please note that if you purchase from clicking on the link, some will result in my getting a tiny bit of that sale to help keep this site going. If you enjoy my work, perhaps you would consider donating to my daily cup of coffee, thank you.

Share

Brewing Magic: Dance with Beans for the Perfect Cup

Calling all coffee enthusiasts! Imagine treating your coffee beans like treasured dance partners in a grand ballroom of flavors. The steps you take in grinding and storing these little gems can set the stage for a brewing masterpiece or a dance floor mishap. So, put on your dancing shoes, and let’s waltz through some essential tips to make your cup of joe sing and twirl with delight. Ready to glide through the world of coffee magic?

Grinding:

Burr Grinder Over Blade Grinder: A burr grinder provides a more consistent grind size compared to a blade grinder. This consistency is crucial for extracting the flavors optimally from the coffee beans.

Grind Size: Adjust the grind size according to your brewing method. Many grinders have adjustments to get the grind you need for the brewing method of your choice:

  • Coarse: French press, percolator, and cold brew.
  • Medium: Drip machines and pour-overs.
  • Fine: Espresso machines.
  • Extra Fine: Turkish coffee.

Grind Right Before Brewing: Coffee starts losing its freshness once it’s ground. Ideally, you should grind just before you brew to ensure you’re getting the freshest flavor.

Storing:

Airtight Container: Store beans in an airtight container to protect them from oxygen, moisture, and light—all of which can degrade the quality of the beans.

Cool, Dark Place: Avoid storing beans in the fridge or freezer unless you’re storing them for an extended period. The fluctuating temperatures can cause moisture to form, which can harm the flavor. Instead, choose a cool, dark cabinet.

Buy Whole Beans: Purchase whole beans and grind them as needed. Pre-ground coffee loses its freshness much faster.

Consume Within a Month: While coffee beans don’t exactly “expire,” they are best consumed within a month of their roast date for optimal flavor.

Time from Grind to Brew:

Immediate Brewing: Ideally, you should brew your coffee immediately after grinding. The first 15-30 minutes after grinding is when coffee is at its peak freshness.

A Couple More Tips:

Water Quality: Use clean, filtered water. The quality of the water will affect the taste of your coffee.

Water Temperature: The optimal brewing temperature is between 195°F (90°C) and 205°F (96°C). Too hot or too cold water can lead to over-extraction or under-extraction, respectively.

Proper Ratios: Generally, a standard ratio is 2 tablespoons of coffee for every 6 ounces of water, but this can vary based on personal preference and the brewing method.

Freshness: When buying coffee, check the roast date. It’s better to purchase from roasters or stores that display this information.

Experiment: Tastes are subjective. Feel free to experiment with grind sizes, brewing times, and methods until you find what tastes best to you.

Cleaning: Regularly clean your coffee grinder and brewing equipment to avoid the buildup of old coffee grounds and oils which can affect the taste of your coffee.

By keeping these tips in mind, you can ensure that you’re getting the best possible flavor from your coffee beans.

Please note that if you purchase from clicking on the link, some will result in my getting a tiny bit of that sale to help keep this site going.

Share

Vietnamese Coffee: A Bitter-Sweet Symphony in a Cup

Vietnamese coffee, known as “cà phê” in Vietnam, is a distinctive style of coffee that originates from Vietnam, a country with a deep history and tradition in coffee cultivation and consumption. The uniqueness of Vietnamese coffee stems from various factors that define its character and flavor profile.

The first characteristic is the type of coffee bean used. Vietnamese coffee is predominantly made with Robusta beans, a variety that is hearty, yields higher caffeine, and imparts a stronger, more bitter flavor compared to the Arabica beans commonly used in Western countries. Robusta beans thrive in Vietnam’s climate and are a significant part of the country’s coffee exports.

The second defining feature of Vietnamese coffee is the brewing method. The coffee is brewed using a specific tool called a “phin”, a small metal drip filter that is a ubiquitous sight in Vietnamese households and coffee shops. The brewing process with a phin is slow, allowing the water to extract the coffee’s robust flavors over a longer period, resulting in a strong and concentrated brew.

Lastly, the use of sweetened condensed milk sets Vietnamese coffee apart. A generous layer of sweetened condensed milk is placed at the bottom of the cup, and the coffee is dripped onto this layer. The resulting beverage is a remarkable balance of the strong, bitter notes of the Robusta coffee and the sweet, creamy richness of the condensed milk. This combination creates a drink that is simultaneously robust and indulgent, encapsulating the spirit of Vietnamese coffee culture.

Vietnamese coffee refers to a style of coffee that originated in Vietnam and is characterized by a few key elements:

  1. Type of coffee bean: The majority of coffee in Vietnam is made with Robusta beans, which are more bitter and have higher caffeine content than the often-preferred Arabica beans of western countries.
  2. Brewing method: Vietnamese coffee is traditionally brewed using a small metal drip filter called a “phin”. The phin is placed over a cup, and hot water is added to the top of the filter. This results in a slow drip, creating a strong, concentrated coffee.
  3. Sweetened condensed milk: This is a hallmark of Vietnamese coffee. A layer of sweetened condensed milk is often added at the bottom of the cup before the coffee is brewed into it. The resulting coffee is a mix of strong, bitter coffee and sweet, creamy milk.

To make Vietnamese coffee at home, you would need:

Here are the steps to make it:

  1. Add 1-2 tablespoons of sweetened condensed milk to your cup. The amount can be adjusted based on how sweet you like your coffee.
  2. Grind your coffee beans to a medium-coarse grind and add 2-3 tablespoons to the phin filter.
  3. Place the phin filter over the cup.
  4. Pour a small amount of hot water (just below boiling) into the filter to allow the coffee grounds to “bloom” for about 30 seconds.
  5. After the bloom, fill the filter with hot water and cover with the lid. The coffee will begin to drip slowly into your cup.
  6. Once all the water has dripped through, stir the coffee and condensed milk together and enjoy!

If you don’t have a phin filter, you can still make Vietnamese-style coffee with a French press or an espresso maker, although the flavor may not be quite the same. The important thing is to use Robusta beans if you can, and to add sweetened condensed milk to balance the bitterness of the coffee.

Please note that if you purchase from clicking on the link, some will result in my getting a tiny bit of that sale to help keep this site going.

Share

Plant Power in Your Coffee: Milk Alternatives to Buy or Make

These are non-dairy beverages made from a variety of plant foods including nuts, seeds, legumes, and cereals. Some of the most popular plant-based milks include almond milk, soy milk, rice milk, oat milk, and coconut milk. These alternatives have grown in popularity for a variety of reasons, including dietary restrictions, allergies, lactose intolerance, veganism, and environmental sustainability concerns.

These milk alternatives can be purchased pre-made at most grocery stores, and many coffee shops now offer them as an option for their beverages. They are also used in cooking and baking as a substitute for dairy milk.

Making plant-based milk at home is also possible and quite straightforward for many types. For example, to make almond milk, you would soak almonds in water overnight, then blend the mixture and strain it to remove the solids. Homemade plant-based milk allows you to control the ingredients and avoid preservatives and additives often found in store-bought versions.

As for popularity, plant-based milk alternatives have seen significant growth in recent years. For instance, in the United States, sales of oat milk alone surged by over 300% in 2020, making it the second most popular plant-based milk after almond milk. Consumers are increasingly choosing these alternatives for their health benefits, environmental footprint, and dietary needs.

When it comes to storage, plant-based milks do have some differences from traditional cow’s milk. Many store-bought plant-based milks are shelf-stable until opened, meaning they can be stored at room temperature unopened but should be refrigerated after opening. However, they generally have a longer refrigerator shelf life than dairy milk. Homemade plant-based milks typically last about 3-5 days in the fridge and should be shaken before use as separation can occur.

It’s important to always check the best before date on store-bought plant-based milk and to smell and taste it before use if it’s been in your fridge for a while. Discard it if it smells or tastes off. As with any food product, the key to safe consumption is proper storage and attention to freshness.

Please note that if you purchase from clicking on the link, some will result in my getting a tiny bit of that sale to help keep this site going.

Share

What is this thing Exploding Called Nito Infused Coffee

Nitrogen-infused coffee, commonly known as “nitro coffee,” is relatively new to the coffee scene. It borrows a technique from the beer brewing industry, where nitrogen has been used for years to create beers with creamy textures and foamy heads.

Origin: Nitro coffee was reportedly first introduced in 2011-2012 by a small, innovative coffee company in Austin, Texas named Cuvee Coffee. The idea was then popularized by Stumptown Coffee in Portland, Oregon, and it wasn’t long before it spread to specialty coffee shops across the U.S. and then internationally. The technique of infusing coffee with nitrogen was inspired by the craft beer industry, particularly by Guinness, which is well-known for its creamy, nitrogen-infused beers.

Popularity: Nitro coffee is popular with coffee enthusiasts who are looking for a new and unique coffee experience. It’s also popular with people who prefer cold and iced coffee, especially during the warmer months. Nitro coffee has a sweeter, creamier taste than regular coffee, which can make it more appealing to people who find regular coffee too bitter. Additionally, the lower acidity of cold brew coffee (the base for nitro coffee) can be easier on the stomach.

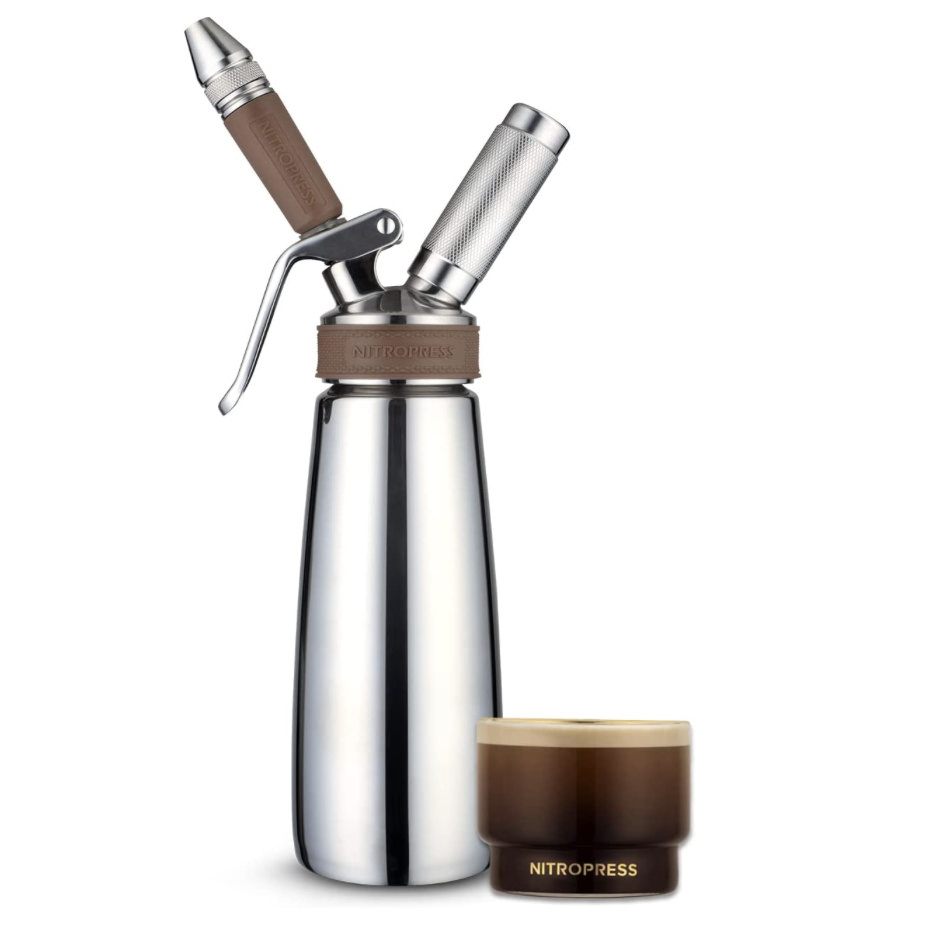
Hatfields London NitroPress

Making Nitro Coffee at Home: While it’s definitely more complex than brewing a standard pot of coffee, it is possible to make nitro coffee at home. Here’s a basic overview of the process:

  1. Brew Cold Brew Coffee: This is the base for your nitro coffee. Coarsely grind your coffee beans and then steep them in cold water for 12 to 24 hours. Strain the mixture to remove the grounds, and you have cold brew coffee.
  2. Nitrogen Infusion: For this step, you’ll need a whipped cream dispenser or a “keg” system designed for home use. Both of these should come with nitrogen cartridges. Fill the whipped cream dispenser or keg with your cold brew coffee and then follow the manufacturer’s instructions to infuse the coffee with nitrogen.
  3. Serve: Nitro coffee is typically served cold without ice (ice can dilute the frothy texture). Pour your coffee into a glass and watch as the nitrogen bubbles create a frothy, beer-like head. Enjoy as is, or add a splash of milk or sweetener if you prefer.

Please remember, using nitrogen canisters requires attention and respect for safety guidelines. Always follow the instructions and safety precautions provided by the manufacturer. If you’re not comfortable handling nitrogen gas at home, you can always enjoy nitro coffee from a local coffee shop.

Please note that if you purchase from clicking on the link, some will result in my getting a tiny bit of that sale to help keep this site going.

Share