A Comprehensive Guide to Coffee Grinders Impact on Flavor

For coffee enthusiasts and casual drinkers alike, the journey to the perfect cup of coffee begins with the grind. The coffee grinder is an essential tool in the quest for that sublime brew, as it plays a crucial role in determining the overall flavor profile. This comprehensive guide explores the different types of coffee grinders and how they affect the taste of your morning cup of coffee.

The Importance of Grinding Coffee

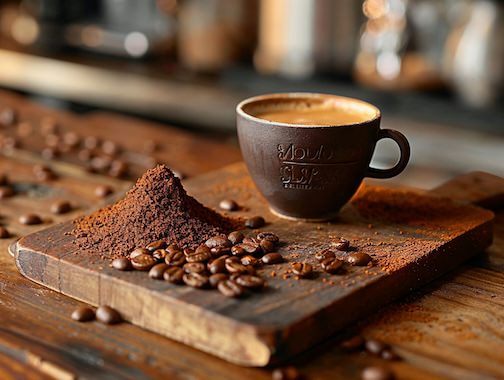
The process of grinding coffee beans breaks them down into smaller particles, which enables the extraction of flavors and aromas during the brewing process. The size of these particles, known as the grind size, significantly affects the rate of extraction and, consequently, the taste of the final brew. For instance, a fine grind will produce a stronger, more intense flavor, while a coarse grind will yield a lighter, more delicate taste. Hence, selecting the right coffee grinder and knowing how to manipulate grind size is crucial for achieving your desired flavor.

There are two main types of coffee grinders: blade grinders and burr grinders.

Blade grinders are relatively inexpensive and straightforward to use. They feature a spinning blade that chops the coffee beans into smaller pieces. The longer the grinder runs, the finer the grind becomes. However, blade grinders often produce an uneven grind, with a mix of fine and coarse particles. This inconsistency can lead to uneven extraction during brewing and, ultimately, a less than optimal flavor. Moreover, the heat generated by the rapidly spinning blade can cause friction, which may alter the taste of the coffee.

Burr grinders are the preferred choice among coffee connoisseurs due to their consistency and precision. These grinders use two abrasive surfaces, called burrs, to crush coffee beans into a uniform size. The distance between the burrs determines the grind size, which can be adjusted to cater to different brewing methods. There are two types of burr grinders: flat burr grinders and conical burr grinders.

Flat burr grinders feature two parallel, flat burrs that grind coffee beans evenly and consistently. They produce a uniform particle size, allowing for optimal extraction and a balanced flavor profile. However, flat burr grinders tend to generate more heat and noise than their conical counterparts, and they can be more challenging to clean.

Conical burr grinders consist of a cone-shaped burr that sits within a larger, outer burr. As the beans pass through the grinder, they are crushed between the two burrs, resulting in a consistent and uniform grind. Conical burr grinders are generally quieter and generate less heat than flat burr grinders, preserving the delicate flavors and aromas of the coffee beans. They are also easier to clean and maintain.

The Impact of Grind Size on Flavor

The grind size directly affects the extraction process and, ultimately, the flavor of your coffee. Different brewing methods require different grind sizes to achieve the best results. For example:

  • Espresso requires a fine grind to ensure a high extraction rate and a rich, full-bodied flavor.
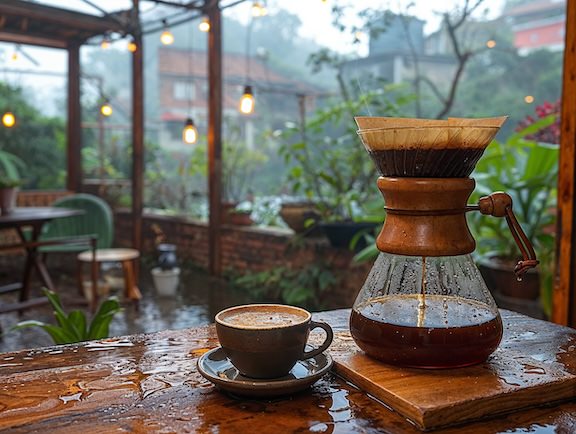
  • Pour-over methods, such as the Hario V60 or Chemex, call for a medium-fine grind to strike a balance between extraction and brew time.
  • French press and cold brew methods work best with a coarse grind to avoid over-extraction and bitterness.

The journey to the perfect cup of coffee begins with selecting the right coffee grinder and mastering the art of grinding. Understanding the differences between blade and burr grinders, as well as the impact of grind size on flavor, is essential

Please note that if you purchase from clicking on the link, some will result in my getting a tiny bit of that sale to help keep this site going.

Share

Don’t make common mistakes when storing your coffee beans

Coffee aficionados know that the secret to a great cup of coffee is using freshly roasted beans ground just before brewing. But what happens when you don’t have access to a grinder at home or don’t have the time to grind your beans every morning? The solution is to store pre-ground beans properly to ensure their potency and freshness. In this post, we’ll teach you how to store ground beans to keep them tasting their best for as long as possible.

Use an Airtight Container

The most important thing when storing ground coffee is ensuring that it is kept airtight. Oxygen breaks down coffee, which means that it will lose its potency and flavor when exposed to air. So, find a container that seals tightly to keep the air out. Mason jars with rubber seals, coffee storage canisters, and vacuum-sealed bags are all excellent options. Store the container in a cool, dark, and dry place like a pantry or cupboard.

Avoid Moisture

Moisture is another enemy of coffee. It can cause the beans to spoil or develop mold, which can be harmful to your health. Therefore, it’s essential to keep the container of ground coffee in a dry place that is away from any water source. If the humidity in your area is high, it’s best to invest in a dehumidifier to keep the air dry.

Store in Small Quantities

Another trick to store ground coffee is to keep it in smaller quantities. When you open the container, the air rushes in, and the coffee will start to lose its freshness. Therefore, it’s best to store ground coffee in portions that will last you a few days to a week. This way, you will only expose a small quantity of coffee to air at any given time.

Don’t Freeze the Coffee

It’s a common misconception that you can freeze coffee to keep it fresh. But this is not true. Coffee beans are porous, and they easily absorb moisture and odors from the freezer. This can affect the flavor of the coffee, and it can even develop freezer burn. So, avoid freezing your coffee at all costs.

Fresh is Best

Finally, the best way to store ground coffee is not to store it at all. Freshly roasted coffee is always the best, and it’s recommended to buy whole bean coffee and grind it just before brewing. If you don’t have a grinder at home, you can always have your coffee ground at the store or invest in a small, inexpensive grinder.

Storing ground coffee correctly is essential to maintain its flavor and potency. The key is to keep it airtight, dry, and away from moisture. Store it in small quantities, and avoid freezing it to prevent freezer burn. Remember, the best way to enjoy a delicious cup of coffee is to brew it from freshly roasted, whole beans. So, the next time you’re at the grocery store, consider buying the whole bean coffee and grinding it fresh for a top-quality brew.

Please note that if you purchase from clicking on the link, some will result in my getting a tiny bit of that sale to help keep this site going.

Share

Unleash Perfect Espresso: Tips for Keeping Your Machine Clean

Are you someone who loves coffee and can’t start the day without a fresh shot of espresso? If yes, you need to take care of your espresso machine. Cleaning your espresso machine is crucial because it doesn’t just help you maintain hygiene but also improve the taste of your coffee. In this blog post, we will discuss some of the best cleaning tips for an espresso machine that will help you enjoy a quality and healthy coffee every day.

Clean the Portafilter After Every Use

The portafilter is the part of the machine that holds the coffee grounds. After each use, run some hot water over the portafilter and use a soft brush to clean the outside and inside. This will avoid the buildup of oils and grounds that can affect the taste of your coffee. For a deeper clean, soak the portafilter in a solution of hot water and coffee machine detergent.

Monthly Descaling

Over time, mineral deposits and build-up can clog your espresso machine’s pipes and affect the taste of your coffee. Descaling helps remove these deposits and keeps the machine working correctly. Simply mix a descaling solution with water, run it through the machine, and then flush with clean water. Descaling should be done at least once a month.

Dismantle it

Before you start cleaning, it’s essential to dismantle your espresso machine. This means removing all the removable parts like the group head, basket, and steam wand. You can rinse some of the parts in warm water, like the steam wand, but others need a thorough clean.

The Group Head

The group head is an essential part of an espresso machine, and it needs to be kept clean every day. You’ll need a brush and a specialized espresso cleaner to do the job. Scrub the group head with the brush, then pour some cleaner through the group head. You should rinse and repeat the process a few times.

The Steam Wand

Finally, you should clean the steam wand. The steam wand is used to froth milk, and its tip is vulnerable to clogging. You can buy a specialized cleaner to do the job. Fill a container with warm water and cleaner, dip the steam wand into it, and turn on the steam. Leftover milk particles will be cleared out of the steam wand’s tip.

Tools

Cleaning an espresso machine requires some special tools. Here are some essentials you may need; a steam wand cleaner brush, espresso machine cleaner, a screwdriver to dismantle the machine, and a soft cloth to wipe the external parts.

In conclusion, cleaning your espresso machine is crucial to maintain the quality and hygiene of your coffee. By following the tips above, you can ensure that your espresso machine stays clean and your coffee always tastes great. Remember to tidy up regularly, so it doesn’t build up, and your machine will last longer. A cleaned and well-maintained espresso machine equals to a better coffee experience.

Please note that if you purchase from clicking on the link, some will result in my getting a tiny bit of that sale to help keep this site going.

Share

Mastering Time: 5 Coffee Drinks That Require Precision for Perfection

If you’re a coffee enthusiast, you know the joy of savoring the perfect cup. But did you know that getting your coffee spot on is often a matter of timing? True coffee lovers know that not all coffee drinks are created equal, and each variation requires a different preparation. If you’re looking to elevate your skills and brew some coffee masterpieces, this blog post is for you. In this post, we’ll explore five coffee drinks that demand precise timing in their making process for the ultimate taste and satisfaction. So let’s embark on this journey of perfecting our barista skills and making the most of our time while brewing.

The humble espresso is the foundation of many beloved coffee drinks. It is a concentrated shot of coffee that packs a punch of flavor, and its ideal extraction time is critical to achieving a balanced taste. The general rule of thumb when brewing espresso is the “25-seconds rule,” meaning that the extraction process should last between 25-30 seconds. A well-timed espresso will result in a rich, golden crema on top, indicating a perfect balance between the coffee’s acidity, sweetness, and bitterness.

If you’re a fan of the classic pour-over method, chances are you’re already familiar with its delicate balance of pouring time and brewing process. To ensure an even extraction and a bold, vibrant flavor, timing is everything. Start by pouring a small amount of hot water in a spiral motion to wet the coffee grounds, then wait for 30-45 seconds to allow the coffee to bloom. After the bloom, continue pouring in stages, maintaining a consistent speed and ensuring that the water level never exceeds the top of the coffee grounds. Aim for a total brewing time of around 3-4 minutes for the best flavor profile.

The French press is another favored brewing method, renowned for its rich and full-bodied flavor. The key to a perfect French press coffee lies in its steeping time. Once you’ve added the hot water to the coffee grounds, give it a gentle stir, and cover the pitcher. Allow the coffee to steep for approximately 4 minutes – any shorter, and the coffee will lack body and taste weak; any longer, and its flavors might get overshadowed by bitterness. After the 4-minute mark, plunge and pour your delicious coffee for a truly luxurious experience.

The AeroPress is a versatile brewing device that offers different approaches based on personal preferences. However, a crucial aspect of AeroPress brewing remains unchanged – the importance of timing. For an ideal AeroPress coffee, aim for a steeping time of 1-2 minutes. Start by adding the coffee grounds and hot water, then stir for about 10 seconds. After steeping for the desired amount of time, press down the plunger slowly and steadily, maintaining a consistent pressure. The entire pressing process should take around 20-30 seconds, resulting in a smooth and full-flavored coffee.

Cold brews have gained immense popularity in recent years, and for a good reason – they offer a smooth, refreshing taste, and are quite easy to make. However, even with cold brews, timing plays a vital role in determining the quality of the final product. Cold brewing involves steeping coffee grounds in cold water (or room-temperature water) for an extended period, typically 12-24 hours. Experimenting with the exact steeping time is essential – a shorter brewing time might lead to a weak and flat flavor, while over-extracting might result in a bitter and unpleasant taste.

There you have it – five fantastic coffee drinks that test your patience and accuracy in brewing. By mastering the art of timing during the coffee-making process, you can ensure that every cup you brew is nothing short of perfection. Whether you’re a professional barista or an at-home coffee enthusiast, understanding and practicing the importance of timing not only improves your skills but enhances your appreciation for the art and science behind coffee brewing. So, the next time you make your favorite cup of coffee, keep these timing tips in mind, and treat yourself to a satisfying, perfectly crafted coffee experience.

I use two types of timers in the kitchen. While there are many nice digital ones, I find the click click of their little buttons distracting. For a set time or length of time I don’t care about time ticking by, a voice assistant does it nicely (just shout out across the room). And, there is the classic kitchen timer that there is some fun in hearing it go tick tick. Please note that if you purchase from clicking on the link, some will result in my getting a tiny bit of that sale to help keep this site going.

Share

Using Coffee to Develop Film: A Complete Guide for Film Photographers

As a film photographer, you may be familiar with the traditional process of developing film in a darkroom. But, I have heard of people using coffee to develop black-and-white film, did you know that coffee can be used as a developer? Coffee is an inexpensive and readily available alternative to traditional film developers. I have seen some interesting and unique results from folks using coffee, though read through to the end, I did find a couple limitations. Not enough for me not to try it.

Here is a complete guide to using coffee as a film developer:

What You’ll Need:

  • Instant coffee or ground coffee beans
  • Sodium carbonate (washing soda)
  • Vitamin C powder
  • A thermometer
  • A stirring utensil
  • A darkroom or a light-proof room
  • A film developing tank and reels

Step-by-Step Process:

  1. Brew a strong pot of coffee or mix a few tablespoons of instant coffee with hot water.
  2. Add 1 teaspoon of sodium carbonate and 1 teaspoon of vitamin C powder to the coffee solution. Stir until fully dissolved.
  3. Allow the solution to cool to room temperature. The ideal temperature for coffee development is around 20-25°C.
  4. Load your film onto the developing reel and place it inside the developing tank.
  5. Pour the coffee solution into the tank, making sure that the film is fully submerged.
  6. Agitate the tank gently for the first minute, and then for 10 seconds every minute thereafter.
  7. After 10-15 minutes of development time, pour the coffee solution out of the tank and rinse the film with water.
  8. Fix the film using traditional fixing methods and rinse again with water.
  9. Hang the film to dry in a dust-free environment.

Tips and Tricks:

  • Coffee development can produce a wide range of tones, from warm sepia to cool blue. Experiment with different strengths and development times to achieve the desired effect.
  • Using high-quality coffee beans or specialty blends can produce even more interesting and unique results.
  • Coffee development may not work well with all types of film, so it’s best to experiment with a few rolls before committing to the process.
  • Coffee is not a long-term stable developer, so it’s best to use the developed film within a few months of processing.

It looks like coffee development can be a fun and creative alternative to traditional film developing methods. With a little experimentation and practice, you can achieve some truly unique and beautiful results. So why not give it a try and see what kind of coffee-inspired images you can create?

Share